Decorators have a lot of questions about hats.
Among the many topics we field on the Decorator Solutions team, hats and caps come up often. Which is completely understandable—when you look at a headwear catalog or website, there are hundreds (if not thousands) of choices.
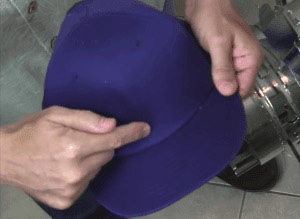
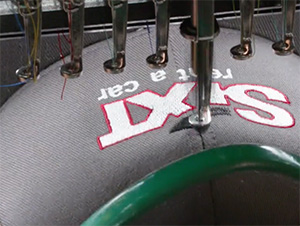
Embroidery is one of the most popular techniques for hat decoration, yet even that comes with its own set of unique challenges. Factors like structure and panels and profiles all come into play on a hat decoration project. Successful hat embroidery often requires a hoop, a specialized attachment for your embroidery machine that holds the hat in place while the design is stitched, seen in this video.
Let’s take a look at a few of the questions we hear on a regular basis about how to embroider hats, caps and one of the most popular headwear styles—bucket hats.
“Can I embroider any hat? Do I need special equipment?”
These questions often refer to a specific hat style a decorator is planning to use. The answer is always the same: it depends on the hat’s construction.
Hats can be made of everything from heavy wool to thin nylon. The material that gives a the front of a cap its shape is called buckram—this can be soft and flexible, or something that feels like heavy fishing line. Seams between the panels connect the buckram to the rest of the cap.
All these factors affect how a hat can be decorated. For the rest of this article, we’ll consider these four categories of headwear:
Sports caps
The most popular style of hat, especially for embroidery. These have six panels, a laminated backing for structure and a center seam down the front. This seam can make for a tricky surface to embroider.
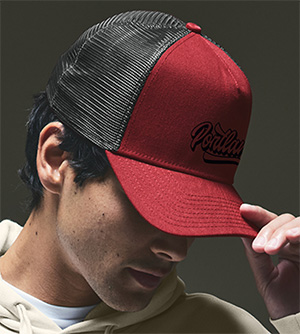
“Trucker,” “farmer” or one-piece front (OPF) hats
A single piece of foam-laminated backing gives these hats structure, while the rest of the hat is mesh material. There’s no center seam, which makes these hats easier to hoop and embroider.

Varsity, collegiate or “dad” hats
These tend to fit closer to the head, with little structure and no backing on the front panel. Hooping properly is important because these hats tend to move a bit during embroidery.
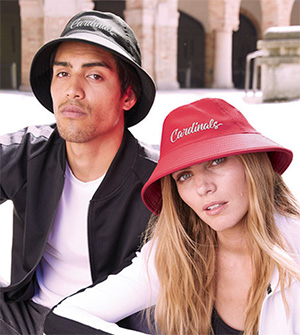
Bucket hats
This unique headwear profile, sometimes known as fisherman hats, has been a steady favorite for years. These are usually made of soft fabrics, like cotton, and don’t have much structure.
“My customer wants to decorate on the side or back of the hat, but the mesh is thick and my needles keep breaking. What can I do?”
So many questions we get are just about where hats can (or should) be embroidered. Poor choices can lead to bumpy decorations, uneven placements and yes, broken embroidery needles.
But decorators are problem-solvers. They’ll find a way! The truth is that no location on a hat is completely off-limits and there are many options to consider.
 Front decorations: the most common decoration placement on headwear.
- For unstructured caps, remember to use a backing or stabilizer.
- Consider tear-away backing, which helps hold the shape of the cap while it’s being embroidered.
- Caps with a soft buckram, or foam-backed caps, may also benefit from a tear-away backing.
 Side decorations: an eye-catching placement that can be challenging.
- Use a back clip. These look a lot like binder clips from an office supply store, and most brands of embroidery machines come with several.
- If clips are not used, the finished design will look like it’s running downhill.
- Backing is a necessity to stabilize the hat. A single piece of cap backing will work for twill and mesh caps
- FlexFit and other stretch-to-fit caps require at least two pieces of backing, or a cutaway backing.
Back decorations: mostly straightforward as long as the hat is placed securely.
- A 12cm conventional round hoop with a cutaway backing is the simplest method for back decorations.
- Several attachments on the market, like a pocket clamp, may also help with placement.
“We’ve never embroidered on a bucket hat before. Is it hooped with normal cap hoops?”
The growing popularity of bucket hats means we get many questions like this one. The good news: the soft material and lack of structure make these easy to embroider almost anywhere, even on the brim, if you have the right supplies.
Since bucket hats have smaller front crowns, the design you embroider should be no larger than 2.5 inches tall by 4 inches wide. Though the vertical part of the bucket hat appears straight, it is actually slightly curved. Adjust your design as needed to fit.
Here’s what you’ll need to embroider a bucket hat:
- Stabilizer: We recommend a firm medium-weight cutaway or sticky stabilizer, but you can use any type that works for you. You need to stabilize your work so it wears well.
- Scissors
- Temporary embroidery spray
- Tape to secure your hat
- Ruler
- Pins
- Embroidery software (only required if you want to edit your embroidery designs to curve perfectly on the brim of your hat)
- Embroidery design
- Bucket hat
 When it’s time to hoop the bucket cap to get it ready for embroidery, following these steps will keep the process moving.
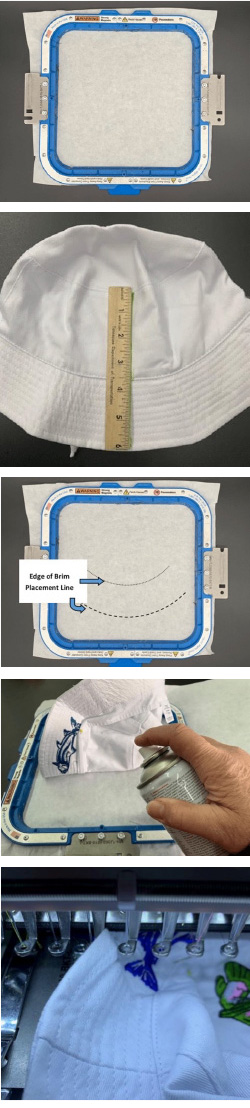
- Start by hooping your piece of stabilizer.
- Pin the center of your bucket hat in the hoop. You can find the center point by folding it in half. Mark the center point with a washable marker. Line up your points to mark a center line on hat.
- Lay your hat flat and take a picture of the brim curve. You’ll use this to create a placement line for perfect results.
- Load the picture into your digitizing software and digitize your placement line along the edge of the brim. Add the decorations you want to the hat brim, and prepare to embroider.
- Stitch the placement line and remove the hoop from the machine.
- Fold the sweatband towards the brim of the hat and secure it with a pin. This will prevent it from coming into contact with the machine.
- Turn the hat right side out and pin the center bottom and top of the hat side on your hoop. Align the center line with the center of your hoop.
- Fold the hat over to expose the stabilizer. Lightly use a temporary adhesive spray to spray the hat fabric to the stabilizer. Do the same for the other side.
- Place your hoop in the machine, being sure to check correct placement.
- Begin the embroidery. Watch the machine carefully to ensure the fabric is not close to the needles or your presser foot.
These videos explain how bucket hats can be hooped on different machines.
- Hooping & Emroidering Bucket Hats from Melco
- How to Use the Hooptech Bucket Frame from Hoop Tech Products
So, can you embroider that hat?
Yes! As long as you know what it’s made of and make the right preparations.
Hats and caps are a big deal in today’s market. They can be used for fishing, boating, golfing and sporting events, just to name a few possibilities. And there are just as many possible variations on the individual features of hats as there are places to wear them.
As a decorator, you’re going to get a lot of requests to embroider on headwear. We hope this guide shows you that whatever your customer is looking to accomplish, there’s probably a way to do it.
If you run into a situation we haven’t covered here, the Decorator Solutions team is always happy to help with advice about particular styles and applications.