The heat press is probably the easiest piece of decorating equipment to learn to operate. In today’s world of labor and staffing shortages, it can be a great way to bring inexperienced help into the fold by quickly giving a new employee the confidence and help develop an eye for detail that will help them deliver quality products and take on new responsibilities in your shop. With a few hours and a little supervision you can have a new someone with no prior experience and have them completing decorated garments almost immediately.
Introduce Your Ideal Settings
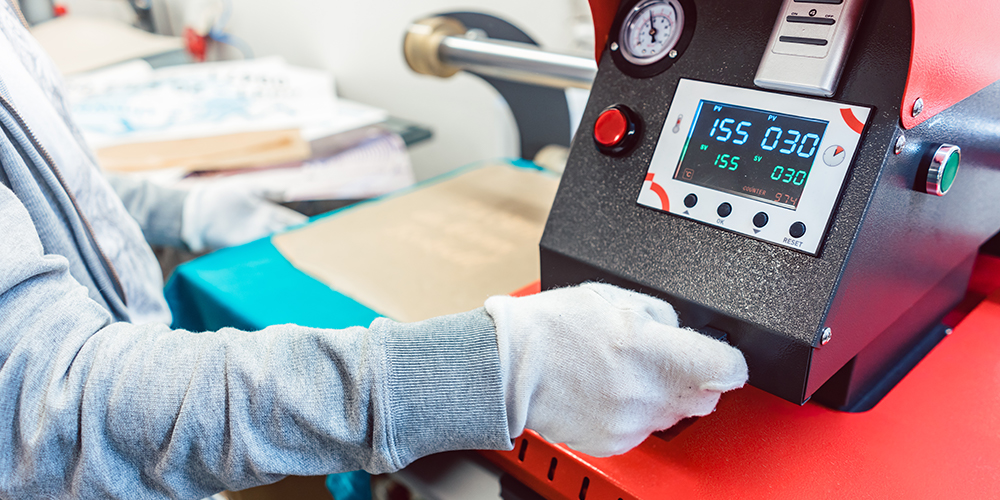
Giving them the tools to solve problems they encounter can help speed their progress. Their first lesson is the press delivers three things: time, temperature and pressure. When introducing these settings, teach your new operator that this is the ideal setting for the application, not necessarily the ideal setting for your machine or your garment. You may need to make changes to those settings based on your machine, or changes in the environment. With some products, heat and humidity play a role in the final output.
Also let them know that the settings are the ideal in range — usually somewhere in the middle to allow for fluctuations and still prevent undercuring or overheating. If the directions say 330 degrees for 8 seconds with a medium pressure, this doesn’t mean your transfer will magically work at 330 degrees or fail at 329 degrees. There is a range of temperatures where the adhesive will melt and bond to a point where it boils or changes its bonding chemistry. Lowering the temp usually means adding more time, raising the temp equals less time.
Remember that if you move too far one direction your transfer may not stick, too far the other way you run the risk of damaging the garment. When these situations arise, don’t be afraid to ask for help! Reach out to your transfer supplier for tips and alternative settings. Having your supplier as a reference and resource available at the press helps avoid costly mistakes.
Like all other decorating techniques, there is an “art” to the heat press. Understanding how the process works early on helps build those skills to tweak and adjust when a new variable is introduced.
Document Your Core Business Processes
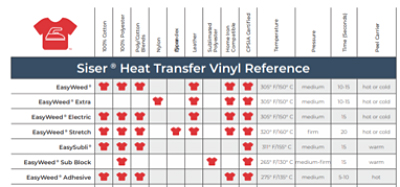
Do you have core products you tend to favor or press most often in your shop? Call these out with successful settings on display or in a notebook. Having a field guide for your equipment and processes, sharing the experience and any pain points of the past and hopefully avoids them in the future. Many suppliers have these readily available.
Provide a tutorial on your equipment, focusing on settings and features. Do you have an ancient machine with a bike handle and rickety old tension spring that shifts and prevents clamping the press? Call it out show how to operate it safely. Maybe it’s an air press? Don’t forget to teach about air pressure and most importantly how to turn on the air. Maybe you have the latest and greatest new digital press with all the bells and whistles? Does it have preset material settings? Show those! Maybe it’s a press that has grease rails that can stain a garment — point this stuff out.
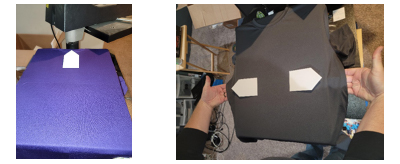
(Right) Using fingers to measure drape on side to make square
Now your newbie is ready to fly, show them how to use their wings. Or in this case hands and fingers. I have often said that, as decorators, we are far more critical of our work than the person wearing it. The secret to a good press starts with the alignment of the shirt. Use the landmarks on your particular machine to help. I prefer to use the center neck of the heat press for my visual alignment and my hands as a gauge to make sure the shirt is even and square. You may have developed your own tools and processes.
What is your process for pressing, threading the shirts on to the platen? Laying both front and back on the lower platen? I started pressing in a Sporting Goods shop and it was mainly names/numbers with screen print front logos. Since our process was to read the name on the shirt before pressing as our last quality check, I still struggle with total confidence when a threaded shirt has an upside-down orientation. Having tools that are shared similar processes for other areas of decoration can help break those bad habits (like mine) .
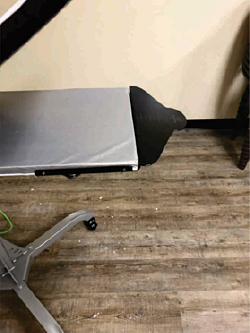
Whether your process involves a t-square, ruler, laser alignment or any other apparatus. The simple steps are use the center neck of the press for the center of your garment. Ignore tags, focus on the drape of the garment. Use your hands to determine if equal parts of the sides of the garment are hanging off each side. Developing a technique that is repeatable and consistent is the key to long term success.